Author Archives: BlueRailTrains

User Showcase – Bob H Walker

Category : UserShowcase

User Bob H Walker

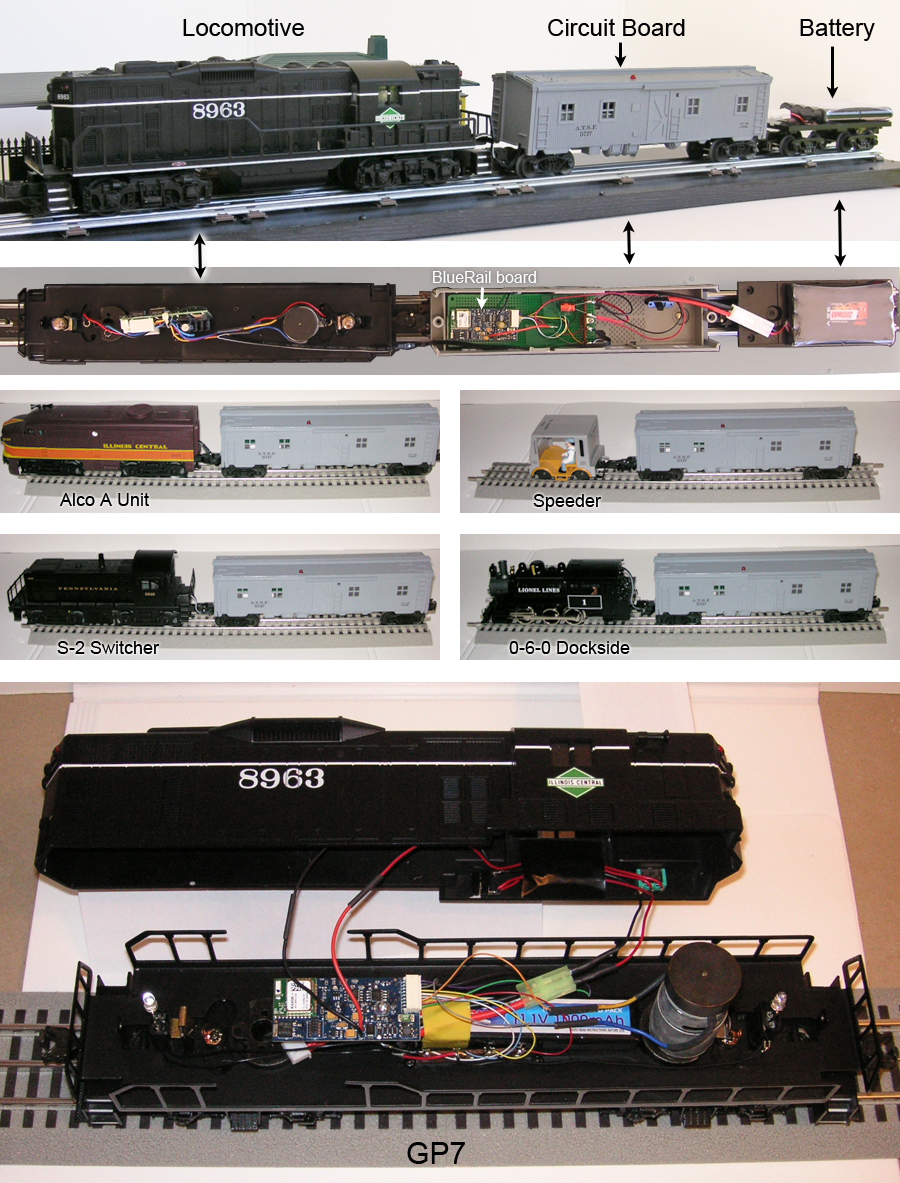
Bob H. Walker is a retired electrical engineer from Tarzana, CA (Motorola, TRW, Teledyne, Corning Glass) who has written over 40 published articles on O Gauge trains and train technology. Bob developed his own battery powered train control system to operate O gauge trains, and is the holder of 5 US patents in the field of solid state wireless radio communications. Many of his other articles introduced the use of robotic servomechanisms used in conjunction with the operation of model train layouts. Bob uses a BlueRail board to operate an O gauge GP7 which he has operated and tested under many conditions, gathering data (some of which will be shared below). The GP-7 is completely self-contained and battery powered. Bob has also installed a BlueRail board in a boxcar with a connection coupler that allows him to switch out various locomotives to pull the train. With this design he has operated an Alco A Unit, an S2 Switcher, a Lionel 0-6-0 Dockside and a speeder. A third car can be towed behind the boxcar housing a battery (when additional battery capacity is desired), creating a very flexible separation of motor power, bluetooth control, and power source.

Bob Walker

Here is some video footage of Bob operating his trains:

Bob powers his locomotives with a 1000mah Lipo battery or a 2000mah NiMH battery (in the trailing car). On the BlueRail board he sets his Start Voltage at .6 and the Update Period at 20ms. Bob ran a series of current drain tests. Here is an excerpt from those results:

Conditions Current Drain
Half-Speed motor – no load 650 ma@12v
Full-Speed motor – no load 690 ma@12v
Half-Speed motor – heavy load 810 ma@12v
Full-Speed motor – heavy load 850 ma@12v

Because these boards use bluetooth low energy, the bluetooth module itself contributes very little to the battery drain.


User Showcase – Kevin Spady

Category : UserShowcase

User Showcase - Kevin Spady

Kevin Spady is the builder and owner of the Pudding River Lumber Company. Pudding River Lumber company was featured in the 2016 On30 Annual. If you have not seen Kevin’s scenery and model work in person do yourself a favor and make some effort to do that sometime. Here is a link to the Pudding River’s photo stream on facebook. Kevin is a member of the South Coast On30 Modular Group in Southern California.

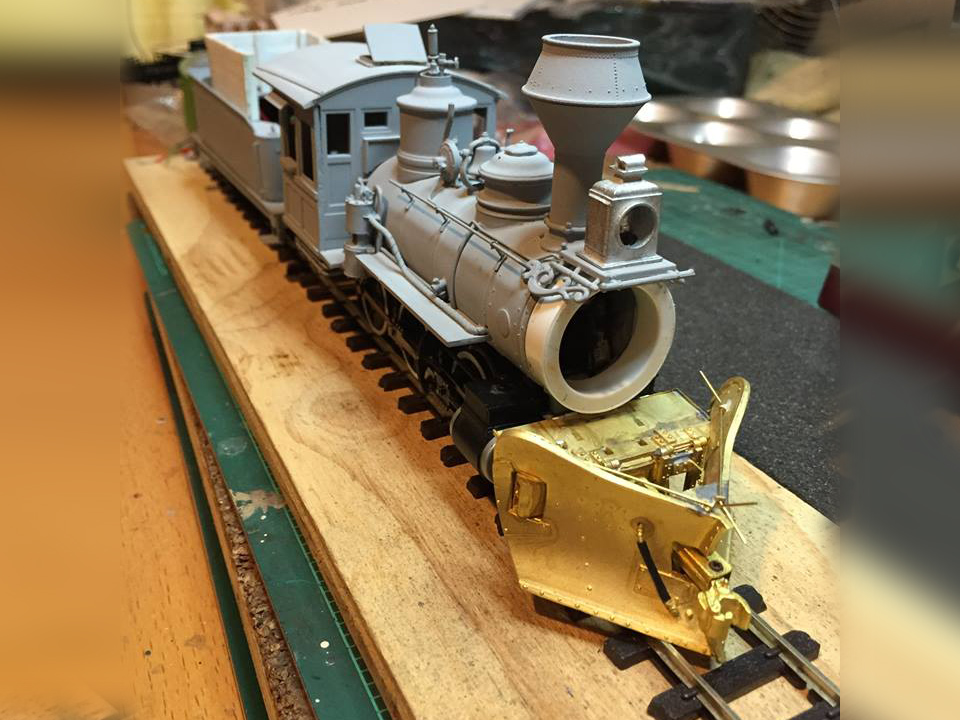
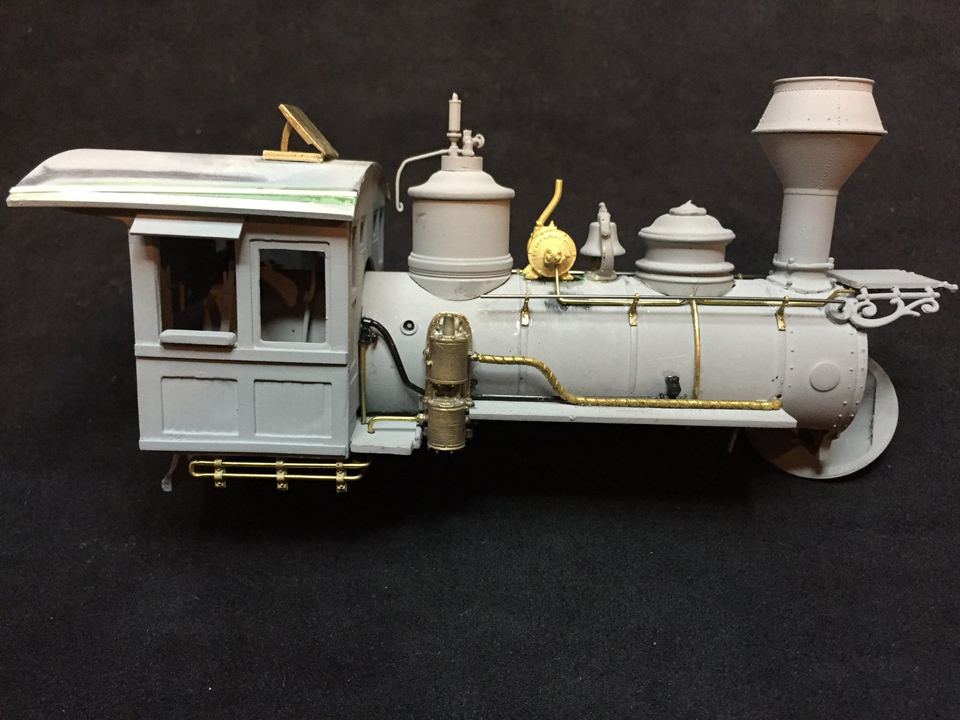
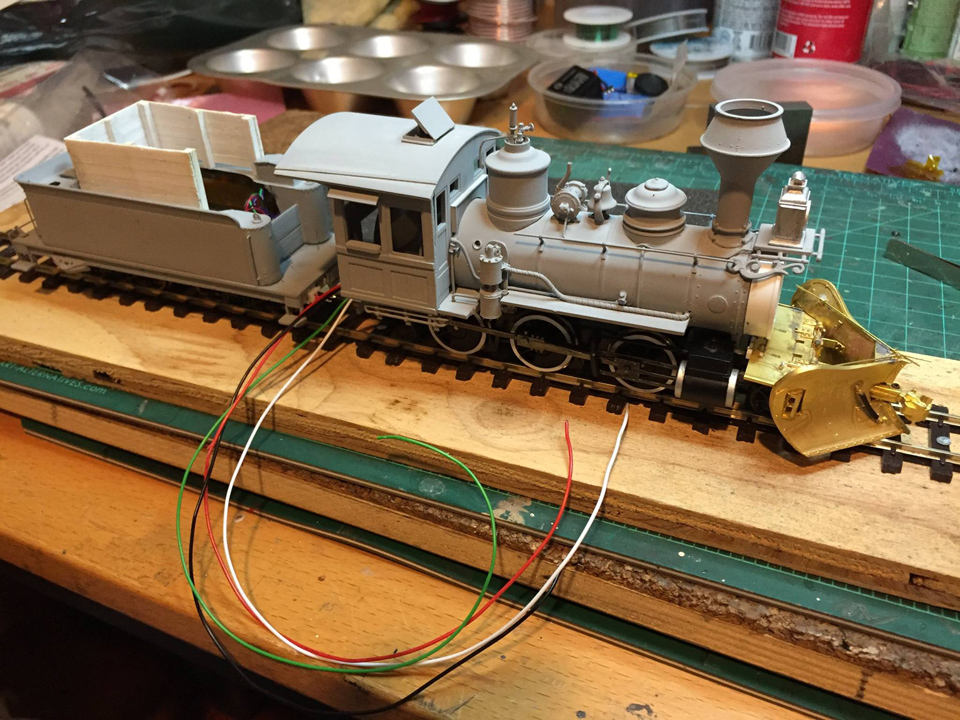
Here are some photos of Kevin’s kit-bashed Bachmann 2-6-0 Mogul with battery powered BlueRail in progress.

KS1KS2KS3KS4KS5KS6


We look forward to posting more photos when the loco is complete.


User Showcase – Steve Seidensticker

Category : UserShowcase

User Showcase - Steve Seidensticker

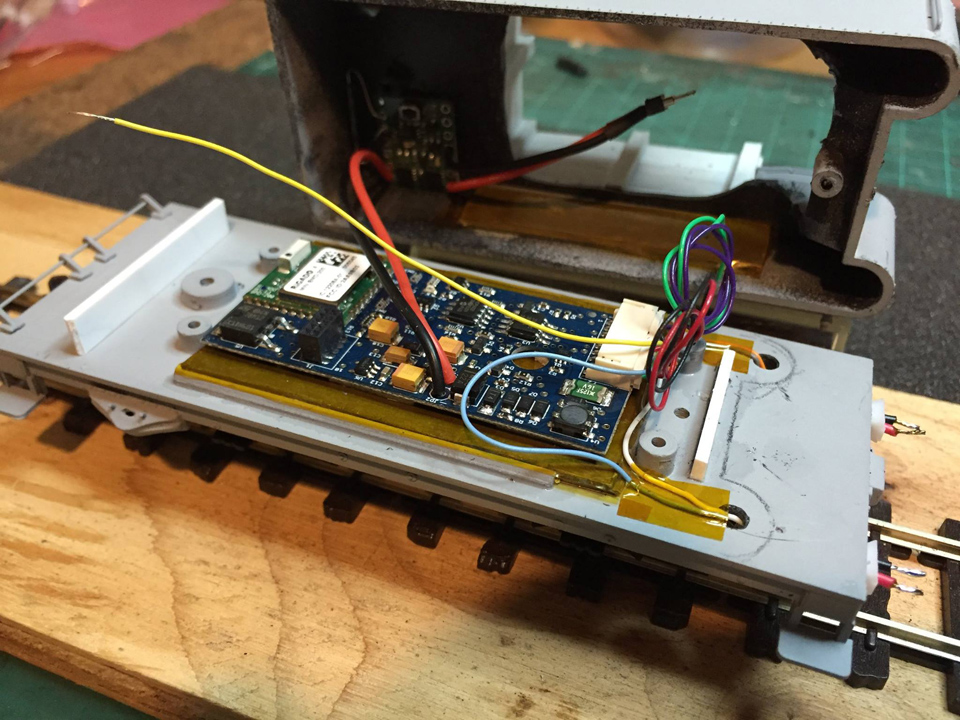
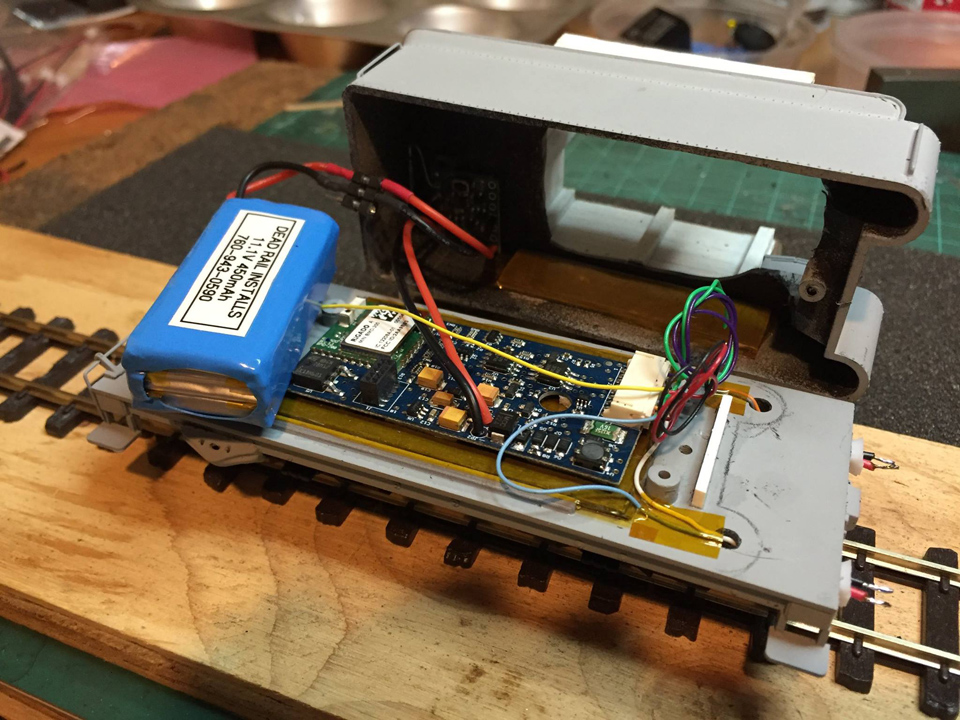
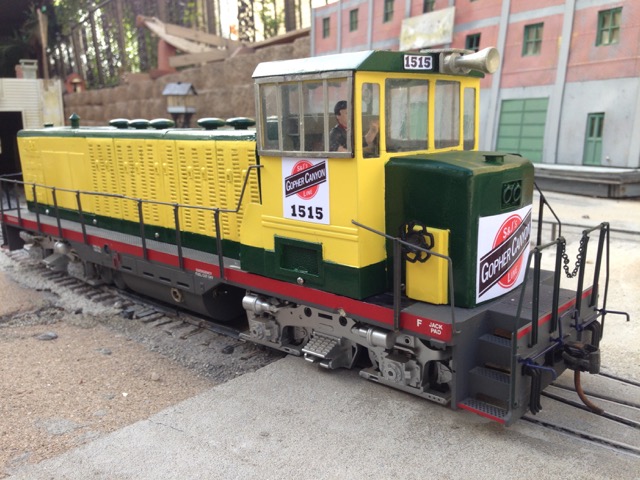
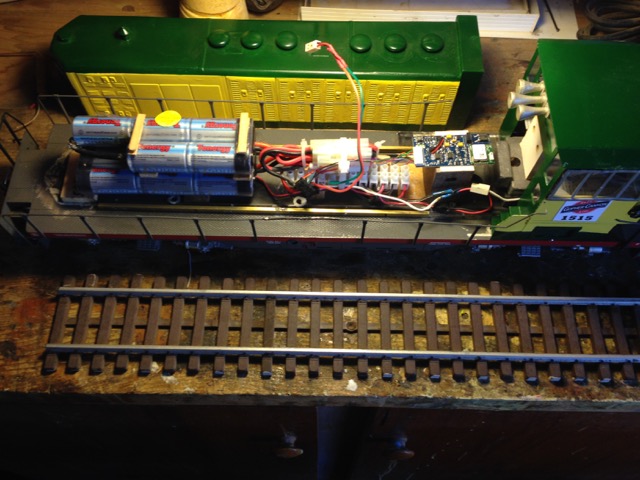
Steve Seidensticker was President of the San Diego Model Railroad Museum in Balboa Park for 11 years and is now owner and operator of the Gopher Canyon Line which is a G Scale outdoor garden layout in San Diego, CA. As the facebook page describes, the trains are about the size of a “loaf of bread”. Steve has installed a BlueRail board in a scratch-built GG-20 on a GP-9. Steve recently ran this loco at an operating session at Gary Siegel’s garden railroad in Santa Barbara. With the BlueRail board, the loco is able to pull a maximum of 14 cars on a level track and 7-8 cars on an incline. Here are some photos of the loco, which is believed to be the first bluetooth “loaf of bread”.

SS1

SS3

SS2

The Gopher Canyon line is a fictitious standard gauge RR that connects the Wisconsin towns of Ashippun (both Old & New), Horicon, Ixonia, Green Bay, and Gopherville.


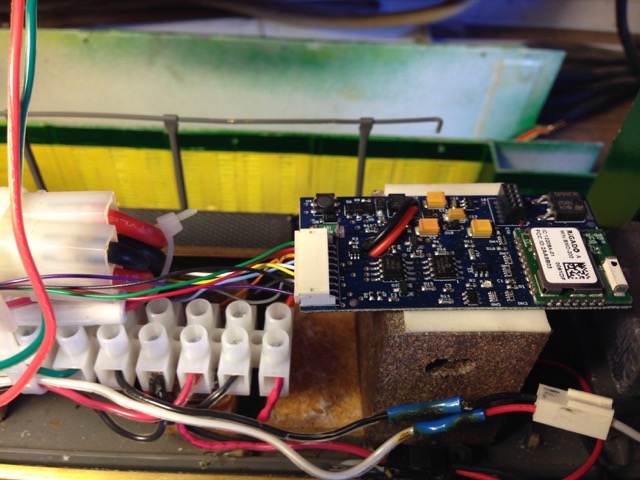
Wiring directly to a Bachmann loco (R, M+, L-, B+, L+, B-, M-, L)

Category : Articles

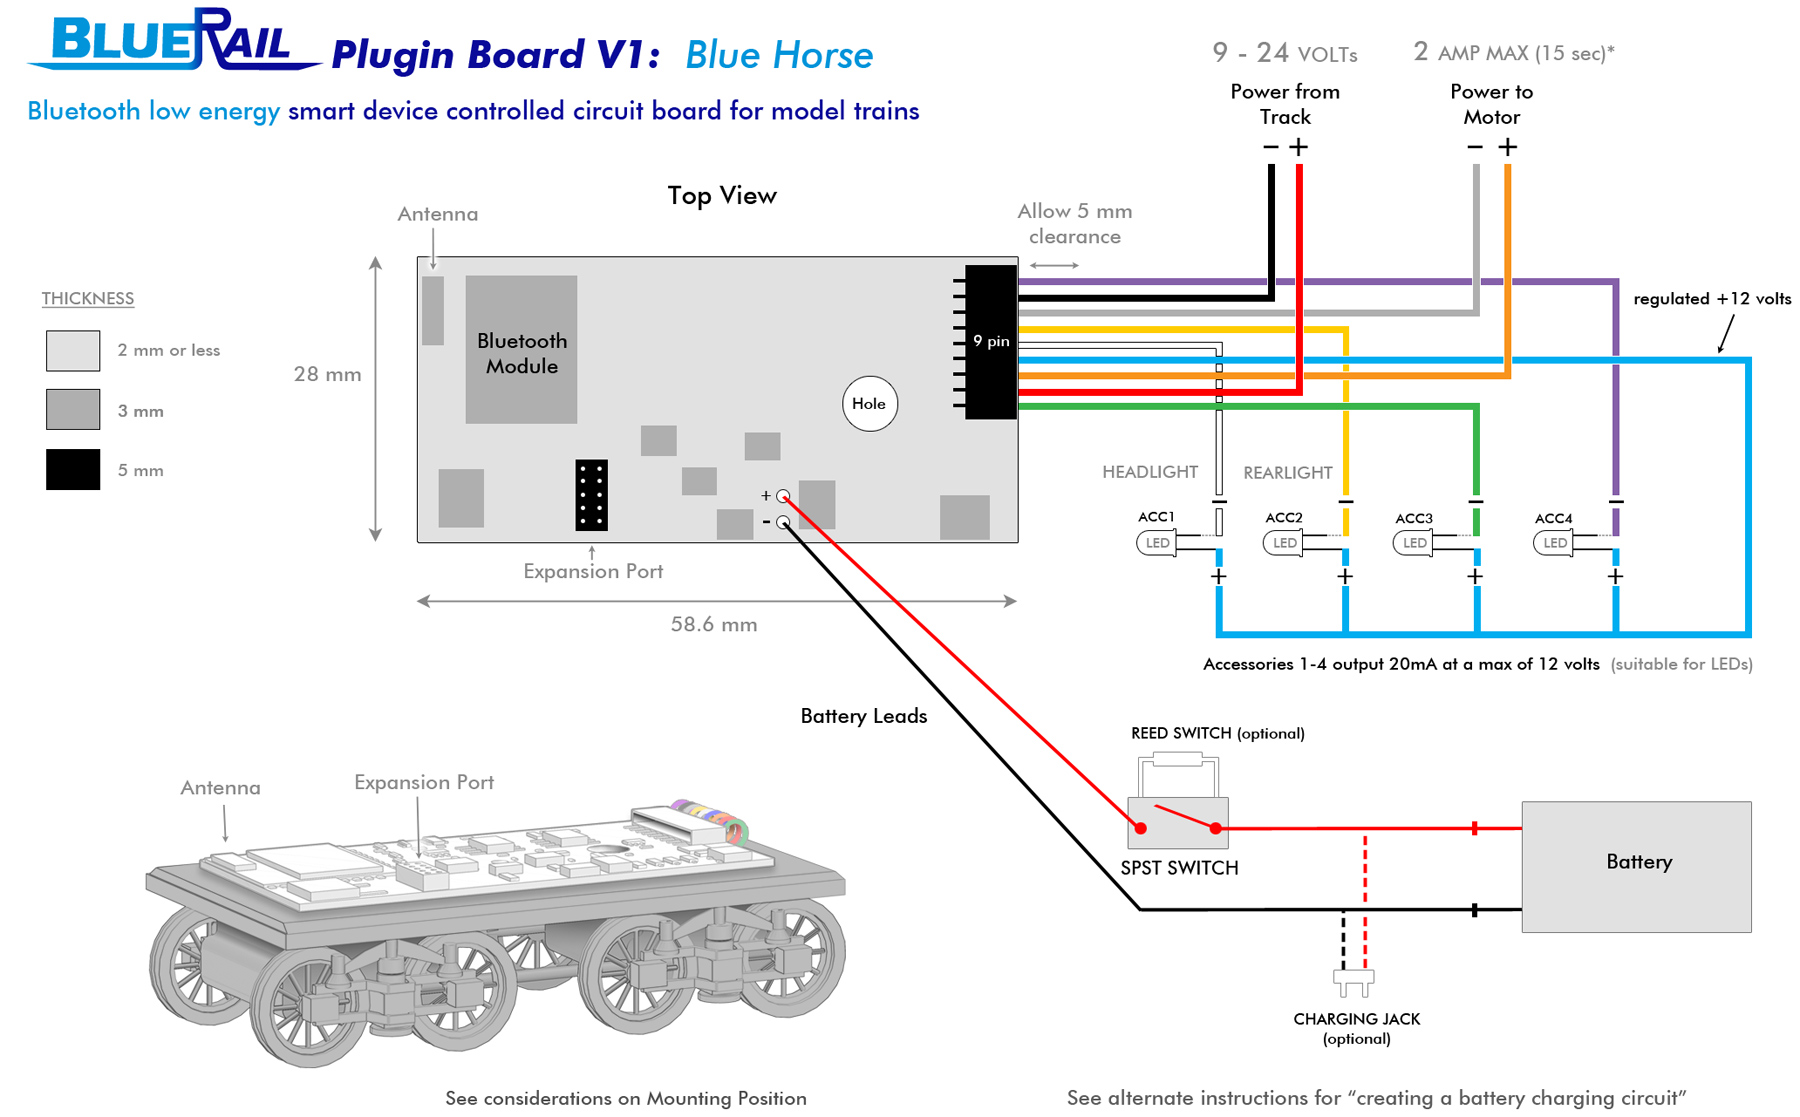
The BlueRail board can be used as a plugin board (plugging into a DCC-Ready port) or as a complete replacement PNP board. Sometimes when putting the BlueRail board into a tight place, it is preferable to remove the old board to make space for the BlueRail board. On Bachmann boards, each wire usually has a letter code where it is soldered to the board. Here is a list of some of the letter codes to help you determine what each wire leads to:

Letter Code Purpose NMRA wire color
R Right Rail (+) Red
L Left Rail (-) Black
M+ Motor positive Orange
M- Motor negative Grey
L+ Light positive Blue
L- Light negative White, Yellow, Green or Violet
B+ Battery positive
B- Battery negative

Once you have identified each wire, simply connect them to the color-coded wire on the 9-pin harness as in this diagram:

BlueHorse datasheet - small


User Showcase – David Rees

Category : UserShowcase

User DRees PageHeader

David Rees is a life long model railroader and founding member of BlueRail Trains. Prior to BlueRail Trains David worked as a Creative Director in the development of games, toys, robotics and app-enabled high-tech products. When David is not developing or running all-things-train, he enjoys playing in the San Diego classic rock band “FreeMartin” and coming up with excuses as to why his 55 Chevy isn’t running right now. He is also a member of the La Mesa Model Railroad Club.

drees_AllPics_400

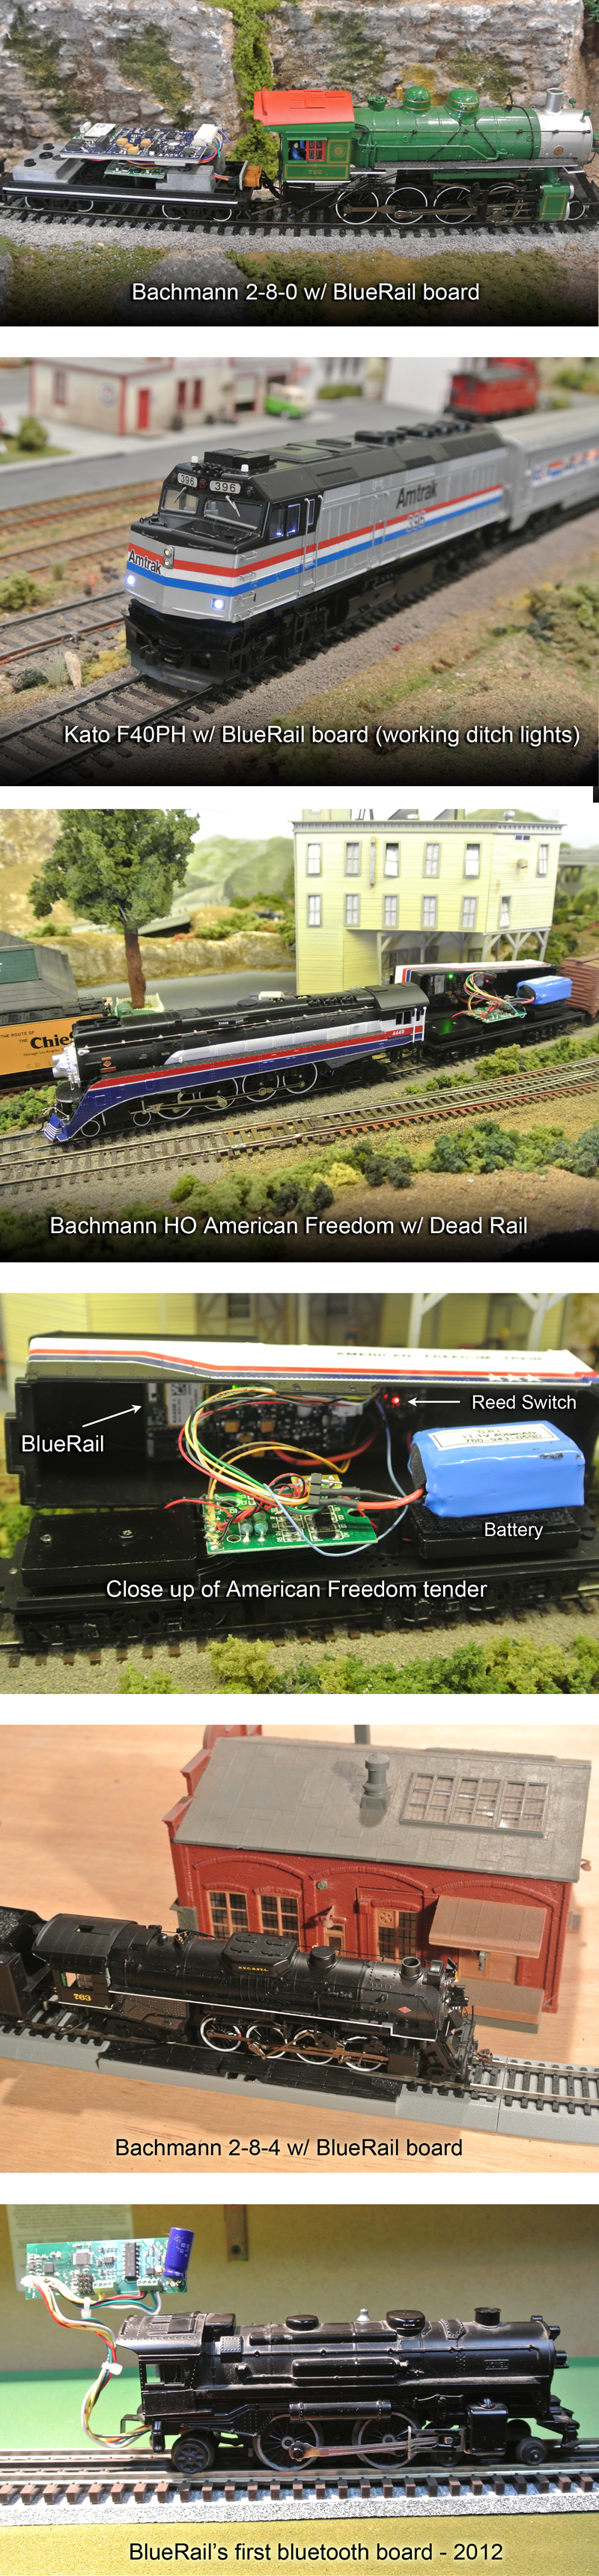
Pictured to the left (click for close up) is a BlueRail board in the tender of an HO Bachmann 2-8-0 consolidation. The board is designed to fit almost any HO steam tender. The board accepts a standard 9-pin connection harness. In this implementation the board uses a 9-8 pin connection harness plugged into the DCC-ready 8-pin port on the board underneath. The underlying board could also be easily removed and the BlueRail board could be wired directly.

Pictured next, an HO Kato EMD F40PH is an excellent loco to put a BlueRail board in. The board fits easily in the loco shell, and the loco comes with Ditch Lights which can be run by the BlueRail board. Out-of-the-box the ditch lights in this loco take their illumination from the headlight LED, but adding 2 additional independent LEDs is a fairly easy modification. These 2 LEDs were wired to the green and violet wires (ACC3 and 4). The BlueRail app makes Ditch Lights easy to setup and use as seen in this video


A larger steam locomotive like this HO Bachmann 4-8-4 American Freedom have plenty of room in the tender for both a BlueRail board and a battery. This loco has the full Dead Rail kit which includes a BlueRail board, an 11.1 Volt 450ma Lithium Polymer Battery, and a magnetic reed switch. This kit is completely plug and play and can be easily installed in minutes. The reed switch allows you to turn the battery on/off with a magnet. For an HO loco you can get 3 or more hours of operation time on a full charge. The image below shows a close-up of the installation, with the board and the magnetic reed switch attached to the top of the shell (with double sided tape).

These photos were taken on the North County Model Railroad Club layout in Oceanside, CA. A big thank you to them.


Down below this is an HO Bachmann 2-8-4 Nickel Plate which also has a BlueRail board with battery on board. Once you switch a locomotive to battery power you suddenly realize most of your performance problems were caused by connectivity issues between your wheels and the track.


The final picture at the bottom is the first bluetooth board BlueRail ever made in 2012. This is a standard Lionel 8602 3-rail loco. The prototype board contains a bluetooth low-energy module which was hand-made by Pete Skeggs of BlueRail Trains and runs on AC power. David had built a (200 ft) three-rail layout in his basement which included steep grades and sharp turns ultimately resulting in disastrous derails (broken locos) when operated under conventional power by undisciplined nephews. After researching the digital command options available and having recently helped develop products for the new (2011) bluetooth low energy protocol, they set to work on a fun project. Programmer friend Eric Laun wrote the iOS control app, and the first bluetooth train came to be.

The first board was nicknamed Boxcar Willy as it was too large to fit in the Lionel shell and had to ride in the tender. This first board still runs well (despite its unsightly appearance).


User Showcase – Bob Delbridge

Category : UserShowcase

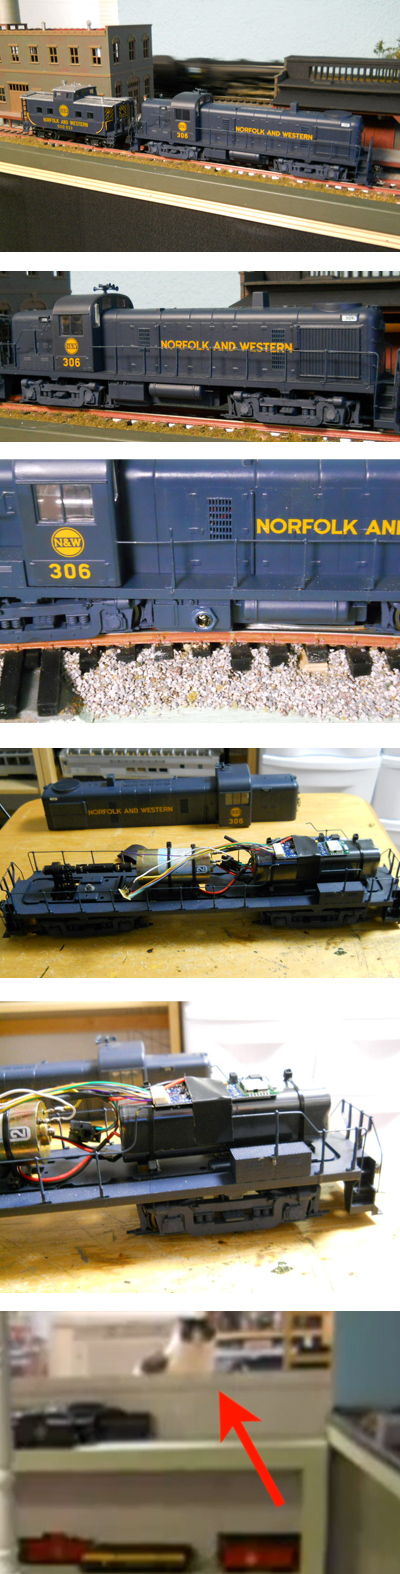
User_BobD_PageHeaderBob Delbridge is a retired Combat Systems Test Director for the Navy who led a team of technicians to test electronics on combat ships. When not playing golf, Bob runs O scale steam engines. His BlueRail board is installed in a Weaver RS3 with a Norfolk and Western paint scheme running Dead Rail. He uses 2000Mah, 9.6v NiMh and 2200Mah, 11.1v LiPo battery packs. Bob’s home videos show some great switcher slow speed operation (and a curious cat).

In keeping with his Navy training, Bob has documented some great data:

Bob DellBridgeTest engine is a Weaver RS3 with traction tires on one axle. Motor is a Pittman 8514. 4 LEDs are installed, 2 at each end of engine (dual lights).

Used 5 Boxcars and a Caboose. Here’s the consist:

Weaver RS3 N&W #306 – weight 33.0 oz
Atlas Boxcar SAL #17388 – weight 19.2 oz
Atlas Boxcar GN #18748 – weight 18.9 oz
Atlas Boxcar A&D 2272 – weight 18.5 oz
Atlas Boxcar N&W 120055 – weight 17.7 oz
MTH Caboose N&W 500833 – weight 13.6 oz

TOTAL weight – 139.3 oz or 8.7 pounds

BlueRail Blue Horse circuit board install, using a 2000Mah 9.6v NiMh battery pack from All-Battery, fully charged.

Layout is approx 12’x12’ loop, with 3-rail track. The center rail is removed, making the layout a 2-rail layout but using 3-rail wheelsets on all engines and cars. Maximum grade is approx 2%, undulating grade. The curves are 072 (36” radius) and the overall length of the loop is 1/3 mile (calculated from using the MTH DCS system which has an odometer built-in).

Used Ipad Air, fully charged, with BlueRail App installed.

App settings were:
Freight setting
75% throttle
ACC/DEC – 255
1st Speed Step – 1
Start Voltage – 1.2v

RESULTS (75% Throttle)

Ran train NON-STOP for 2hrs 45mins.

Top speed was 27.7 scale miles per hour.

At 2hrs 15mins loco speed was measured at 27.7 smph.

At 2hrs 30mins loco speed was measured at 18.5 smph.

At 2hrs 45mins loco slowed down then stopped.

RESULTS (100% Throttle)

Ran train NON-STOP for 2hrs.

Top speed was 32.7 smph.

At 2hrs 15mins loco speed decreased to 29.3 smph.

That’s only 7 minutes shorter run time than at 75% throttle setting, but 5smph faster.


This curious cat makes an appearance in the video at the 1:16 mark.

Although the BlueRail board drives the loco motor at 16 kHz (well beyond human hearing range) cat’s can hear up to the 64 kHz range, making them keenly aware of subtle changes in loco speed.


Slow speed operation with BlueRail app

Category : Videos


This video demonstrates slow speed operation on bluetooth locos using the BlueRail app.


Tuning Locos and the Advanced Tuning Panel

Category : Articles

This article is about the “Advanced Tuning Panel” in the BlueRail App. For the vast majority of users, you just drop your board in and you’re off and running. But electric motors can vary from loco to loco, and its inevitable that there are going to be some locos that need a little additional tuning to the default settings in order to achieve smooth slow speed operation. For this reason, we have included an “Advanced Tuning” panel in the BlueRail app – to allow users to “tweak” slow speed operation. This article is for those people.

So how do you know if your loco needs advanced tuning? Symptoms that you might need advanced tuning are if your loco jiggles a little when traveling at slow speed, or if it starts to roll, then stops.

If the loco is stopping immediately, you’ll also want to read the articles about “measuring you loco’s stall current” and “verifying your motors are isolated from the chassis and the rails“. You can recognize stops related to amperage issues, because they are usually followed by a “cool-down” period, after which a fuse in the board resets itself (or you may have to turn the board off and back on).

You’ll know your loco is stopping because of a tuning issue, because you can immediately run the train again the moment after it stops.

A little technical background, we use Pulse Width Modulation to run the loco motors. This is essentially a sine wave with 16,000 pulses per second. The exact shape of this sine wave is defined by an equation (we’ll call the PID equation), and this equation has 8 variables that dictate the shape of the waves. By adjusting these 8 variables, you can “tune” the shape of the wave to pretty much any motor. At BlueRail we have tuned these 8 variables to values that seem to work for 90% of the locos out there (we call these the default tunings). If you’re loco is jiggling at slow speeds, or starting then stopping (and its not an amperage issue) then it’s time to play with the tunings.

Some of the tuning variables you may be familiar with. Start Voltage is one. Three popular options for Start Voltage (0v, .6v and 1.2v) can be found in the loco settings screen.

Start Voltage simply gives your loco a little extra voltage so it doesn’t take so long to get rolling. Its kind of like “frosting” on the tuning settings, so when diagnosing a tuning issue it’s safest to set the Start Voltage to 0. This is because Start Voltage can cause issues if it is set too high. You can always come back and add some Start Voltage in the end after you are happy with your loco tuning.

The first tuning variable you want to play with (after setting Start Voltage to “0”) is the “Update Period”. The Update Period dictates how often (in milliseconds) that the loco speed is measured and the PID equation gets run. The most popular settings we have found for this are 10ms, 20ms and 35ms. So inside the settings screen you’ll find these 3 options. Try these options, and see if they affect you’re locos initial take-off. If they don’t, it’s time to go to the “Advanced Tuning” panel. To get to the Advanced Tuning panel, go into the loco settings screen and scroll to the bottom till you see “Advanced Tuning”. (The Loco Settings screen is accessed by clicking the “Cog” in the Train Control screen).

Turn on the Advanced Tuning panel (by sliding the toggle). When you return to the Train Control screen, you will see a small “Tuning Fork” button at the left of the screen. Slide that out to access the Advanced Tuning screen. (This screen will look slightly different based on whether you are using Android or iOS.)
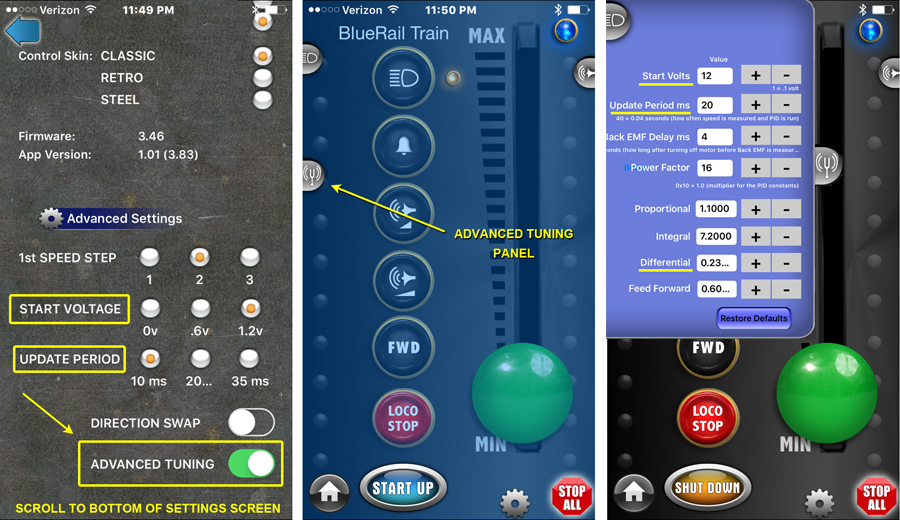

Advanced Tuning Panel


In the Advanced Tuning screen, you will see all 8 variables that control the PID equation. You’ll recognize “Start Voltage” and “Update Period” at the top of the panel, displaying the numbers you have selected in the loco settings screen. (Please note Start Voltage is displayed in tenth of 1 volt, so 0v, .6v and 1.2v display as 0, 6 and 12).

To play with the tunings, make sure the Start Voltage is at 0, and begin tweaking the “Update Period” as you run your loco (using the up and down arrows). Try numbers below 10ms and above 35ms, and see how they affect your loco starts. Don’t use values below 0.

If this doesn’t really have any affect, set the Update Period to a middle value (20 ms) and move down to the “Differential” field (second from the bottom). This is the second most common PID variable that can affect slow speed performance. Try setting Differential to “0” and run your train. I have found Bachmann trolleys, N Scale, and some older trains need a setting of “0” to start properly. If that doesn’t work, try setting the Differential higher than the default setting of “.23”. If you CAN find a Differential setting that has a positive impact on your slow speed takeoffs, go back to your “Update Period” and see if you can use it to refine things. If not, you can move on to the other variables (Proportional, Integral and Feed Forward…) to see if you can get any affect from tweaking them.

There is a “Restore Defaults” button in the panel (to bring you back to the original default tunings) so don’t worry about trying different settings.

“Power Factor” acts as a global power multiplier which you might as well leave at 16.

If you DO find tunings that improve the low speed performance of your loco, please email BlueRail with your settings and the type of loco you have. We will add this to our database of presets so future users with the same loco can utilize your settings.

Thank you for your patience and feedback in helping us find the best tunings settings for every model of locomotive on the market. With your help we will add them to the app as presets so future users can avoid having to tune their locos.


Charging Batteries from BlueRail Trains

Category : Articles

The batteries supplied by BlueRail Trains are high quality commercial cells. These are not RC cells. They come from a factory that makes many batteries for the medical industry.

It is best to charge 250 packs at 100mA(.1 amps), 400 and 450 packs at 200ma(.2 amps), 500 packs at 300mA(.3 amps), and 850 packs at 400mA(.4 amps). The pack is a 3S or 11.1 volt pack. The charger should be set accordingly.

Only use a charger that is designed for Lithium Polymer batteries.

The recommended battery charger is the HiTec RC X1 AC Plus. User can set the charge rate. They are very reliable. The X1 AC Plus is available at RC shops and on Amazon.

Another good charger we have found is the iMax B6AC Dual Power. I have been told that the IMAX B6AC v2 requires a balance connector to be present by default (our batteries do not have or need balance connectors). This default can be changed in the iMAX system settings (Balance Connector = NO).

Do not charge with the cheap wall plug in chargers. The charge rate is usually 500ma to 1 amp. This is to high a charge rate. The charger is not programmable.

These packs have a small PC board on each cell. This is called a PCM. It keeps the battery from over charge, short circuit, over discharge, and low voltage.

Low voltage is especially important. It cuts off the discharge at 3 volts per cell or 9 volts. Running an unprotected pack until it stops can and will damage the battery.

Packs from the RC world do not have PCMs. The RC packs are designed for high discharge rates. They would trip the PCM, which is set to trip at 3 amps discharge.

After tripping, the PCM will reset after a few minutes.

DeadRail Kit Battery Size Options:

11.1 volt batteries for the DeadRail kit come in a variety of sizes:

Capacity Length Width Height Charge Setting Comment
250mA 33mm 25mm 18mm 100mA Smallest size available
450mA 46mm 23mm 18mm 200mA Medium size
500mA 40mm 27mm 18mm 200mA Medium size
850mA 52mm 31mm 18mm 400mA Large size – good for larger scales

The 450mA and 500mA batteries are comparable in size to a 9-volt battery.

A popular strategy is to use a 250mA battery (which has the smallest profile) and situate the battery in a place where it can be swapped out for recharging.

The number of running hours per charge varies based on the amperage draw of your loco, the number of cars you pull, and inclines on your layout. Some users get 1-3 hours per charge.

Some safety precautions for all lithium batteries:

Charge only at recommended charge rates.

Never leave the batteries unattended while charging.

Charge on a nonflammable surface.

Do not charge near flammable objects.

Don’t get the packs wet.

If the cells start to swell or grow in size, discontinue use.

Do not attempt to disassemble the battery pack.

Do not puncture the cells with sharp objects.

Store at room temperature

Dispose of properly. Not in the trash.

Batteries provided by DeadRail Installs.


BlueRail Trains – Running a conventional train and layout lighting with a BlueRail board

Category : Videos


Demonstration of using a BlueRail plugin board to power a conventional train set and control layout lighting or accessories.