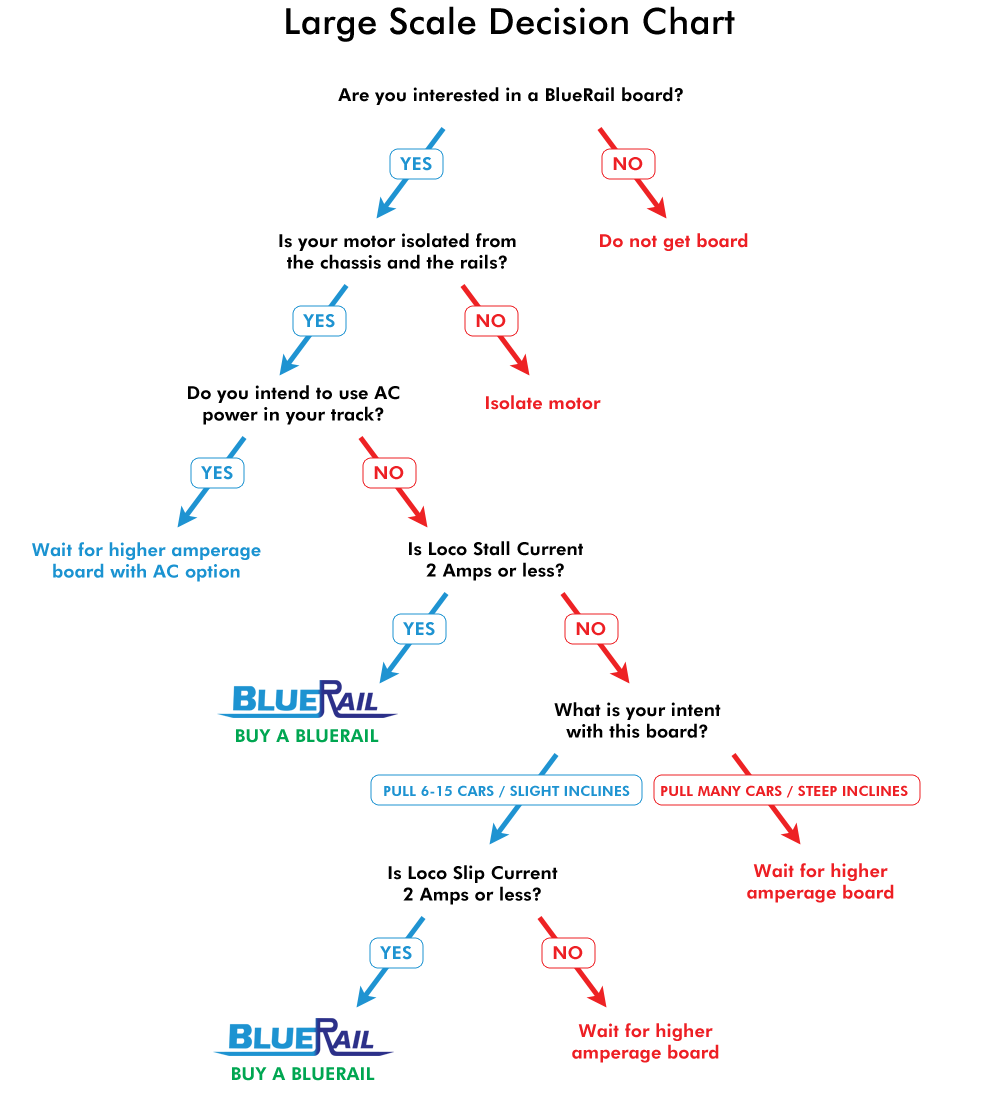
Considerations for using BlueRail board in larger gauges
Category : Articles
BlueRail’s first board targets HO steam tenders, S, On30 and lower amperage O and G trains. A narrow board (more appropriate for for HO diesels) and a high amperage board will be released subsequently. Many people are happily running this first board in their O and G locos. Understanding the board’s amperage specs is key to deciding if this first board will work in your larger scale loco.
The first basic thing to check (regardless of amperage) is to make sure your DC can motor(s) is electrically isolated from both the chassis and the track. This is a necessity for using any train control system to run your loco. Please refer to THIS ARTICLE to test that. It is also of course key that you have determined you have the space somewhere to put the board.
The second thing (which is related to amperage) is knowing your locomotives SLIP and STALL current. HERE is an article on how to determine your loco’s stall current. HERE is a great online reference I have found with the stall and slip currents of many trains already listed. The idea is to understand how many amps your loco draws when it is trying it’s hardest (ie pulling 100 cars uphill). There is also a second part of this related to how slippery your wheels are. If your wheels start slipping under a certain amount of load, your loco will never actually reach it’s full stall current (when pulling many cars uphill). For this reason, that site lists both the “slip” stall current and the “hard” stall current. When testing stall current yourself, this is a factor of how hard you push down while testing (ie hard enough to keep the wheels from turning or not). If your loco has a SLIP current of 2 amps or less, it is a candidate for this BlueRail board.
 The maximum amperage support from the board follows a curve (in RED above). Locos generally draw higher current when they first start rolling. For this reason, the board is designed to handle 8 amps for the first 1/2 second and 4 amps for the first second. This is to give some extra headroom as you first start to roll. After 15 seconds of continuous pulling, the curve is down to 2 amps. The board assumes you have a little momentum going by then, and your loco is not close to “stalling”. After 1 minute of continuous pulling, the amperage support eases down to 1.2 amps. If the board senses the max amperage support has been exceeded, it shuts itself off (via a PTC fuse) and protects itself.
For discussion purposes, referencing a G scale Bachmann 4-6-0 on the chart we see a “slip” current of 1.5 amps and a “hard” stall current of 4 amps. Depending on how many cars it is pulling and how steep and long the inclines are, it can be kept within the board’s amperage curve. This loco may be able to pull 10-14 cars on a level layout, and perhaps 8-9 cars on an incline. Pulling 20 cars up steep inclines that last more than a minute (on the other hand) would likely trigger the onboard protection.
The objective is to consider your loco’s slip and hard stall current, how many cars you intend to pull, and how steep and long your inclines are, and decide if this first board is in the ball park. With the board in place, run your train with a couple of cars, and add a few more till you find the “sweet spot” as to how many cars you can pull (on both level track and an incline). Don’t start right off pulling 20-30 cars. The durability of the PTC fuse is a factor of how much you exceed the amperage draw by, so if you throw 10 amps at it all it once you could damage it. But as long as you gently find your limits and then stay within them, you should be fine.
You can wait around for the higher amperage board (we do not yet have a release date on that) but the truth is, this current board might be sufficient for some of your locos. Please visit our User Showcase to see some of the locos this board is currently used in.